Review this guide to learn how to create a Pyramid website in IIS after an install. If you have decided to use the IIS option after the Pyramid installation, you can add the site manually.
First, you need to install the following IIS modules :

To install "IIS URL Rewrite Module 2" and "Microsoft Application Request Routing 3.0", download and install them using the links below. Note, that before installing them, you'll need to close IIS first:
- Microsoft Application Request Routing 3.0: https://www.iis.net/downloads/microsoft/application-request-routing
- IIS URL Rewrite Module 2: https://www.iis.net/downloads/microsoft/url-rewrite
Once the above two IIS add-on's have been downloaded, run the installer and follow the on-screen prompts.
When the above two models have been installed, activate the proxy as shown below:
Step 1
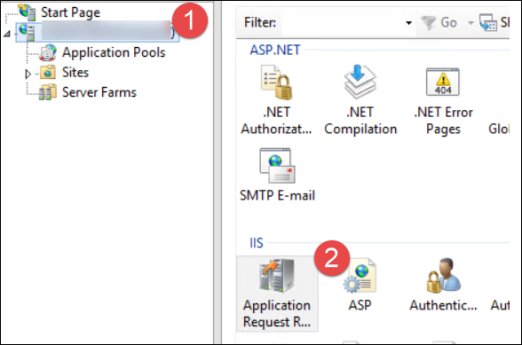
Open IIS > Double click on the server name(1) > Double Click on "Application Request Routing Cache"(2)

Tick the box "Enable proxy"(3) > Click on Apply(4)

Step 2
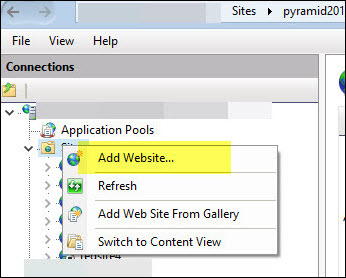
Next, create a new website and point it to the following location:
C:\program files\pyramid\repository\iis

Step 3
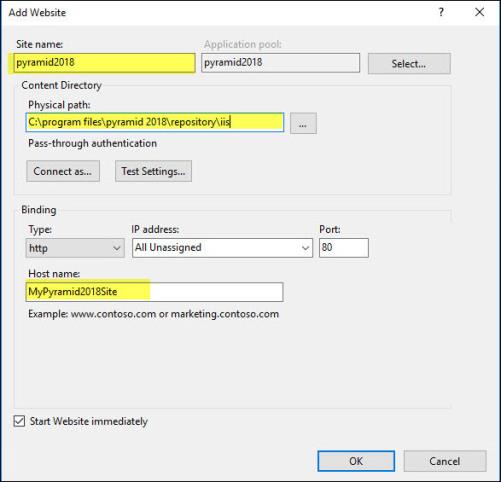
Under 'Site name' enter "pyramid".
Under 'Physical path' enter C:\program files\pyramid\repository\iis.
Under 'Host name' enter anything, but note that you must add this to your DNS or local host file.

Step 4
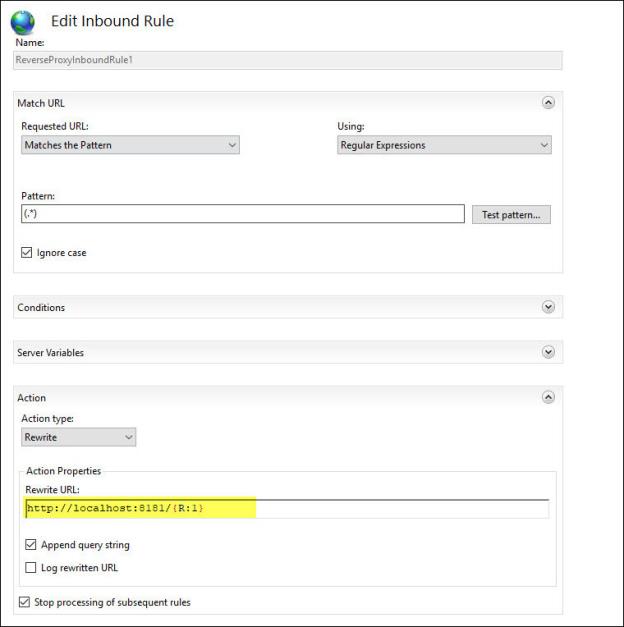
Next, double click on the newly created site > URL Rewrite.
Double click on the first rule and make sure the Rewrite URL is: http://localhost:8181/{R:1}

Step 5
Once these steps have been performed, do an IISRESET and then try to access Pyramid again using the newly created IIS website.
NOTE: Ensure that the relevant ports are open on the firewall: 80 for HTTP and 443 for HTTPS.